
Need to buy carrier oils or essential oils? Visit the shop here
WHAT YOU WILL NEED:

1 Large mixing bowl
1 Smaller mixing bowl
Spoon or whisk
Molds - Can be metal like ours or a silicon mold
1 TSP of Carrier Oil - We chose Shea Nut for its skin nourishing properties
35-40 drops of Essential Oil - We chose Love for a romantic theme
Food Dye - Optional, but its fun to add some color! We chose red to make pink
1/2 Cup of Baking Soda
1/4 Cup of Citric Acid
1/4 Cup of Corn Starch
1/4 Cup of Epsom Salts
Water
STEP 1

Pour all the dry ingredients (1/2 cup Baking Soda, 1/4 cup Citric Acid, 1/4 cup Corn Starch, 1/4 cup Epsom Salts) into the large mixing bowl and then stir together until it looks evenly mixed.
STEP 2
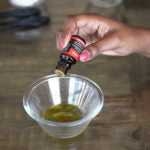 Into the smaller mixing bowl, add 1 tablespoon of water, 1 teaspoon of carrier oil (we chose Shea Nut), and 35 to 40 drops of essential oil (we chose the Plantlife Love blend). If you want to make the bath bombs a color, add a few drops of food coloring to the bowl. You can be creative here and make any color you want, but you don't want to add too much. We added 5 drops of red to make pink. Then mix until well combined.
STEP 3
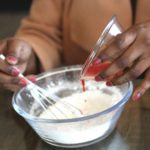 The next step is to add the wet ingredients into the dry ingredients in the large mixing bowl. The key to this step is to add the wet ingredients very slowly because if poured too fast, the citric acid and baking soda will start reacting, making it fizz. Slowly pour the wet ingredients a little at a time into the dry ingredients and mix as you are pouring. Once all ingredients are together, stir until there are no clumps and everything is well combined. The mixture should seem dry and kind of crumbly, rather then wet or damp.
STEP 4
 Spoon the mixture into the mold of your choice, packing it down as much as possible. Let the bath bombs sit overnight in the mold or if you are in a hurry, you can also put them in the fridge for a few hours to try and speed up the hardening process. However, letting them sit overnight is best because excess moisture will evaporate, leaving behind a solid, ready to use bath bomb.
STEP 5
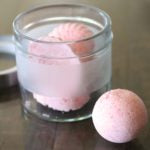 Once dried, your bath bomb is ready to use! Pop it out from the mold and store in an air tight container. Spruce it up by using a mason jar or glass container with a ribbon and gift tag!