One of our favorite ways to wow guests is this simple, yet effective, flavored toothpick recipe. Whether it’s creamed spinach or corn on the cob, it’ll turn an everyday chore into a memorable moment.

What You’ll Need:
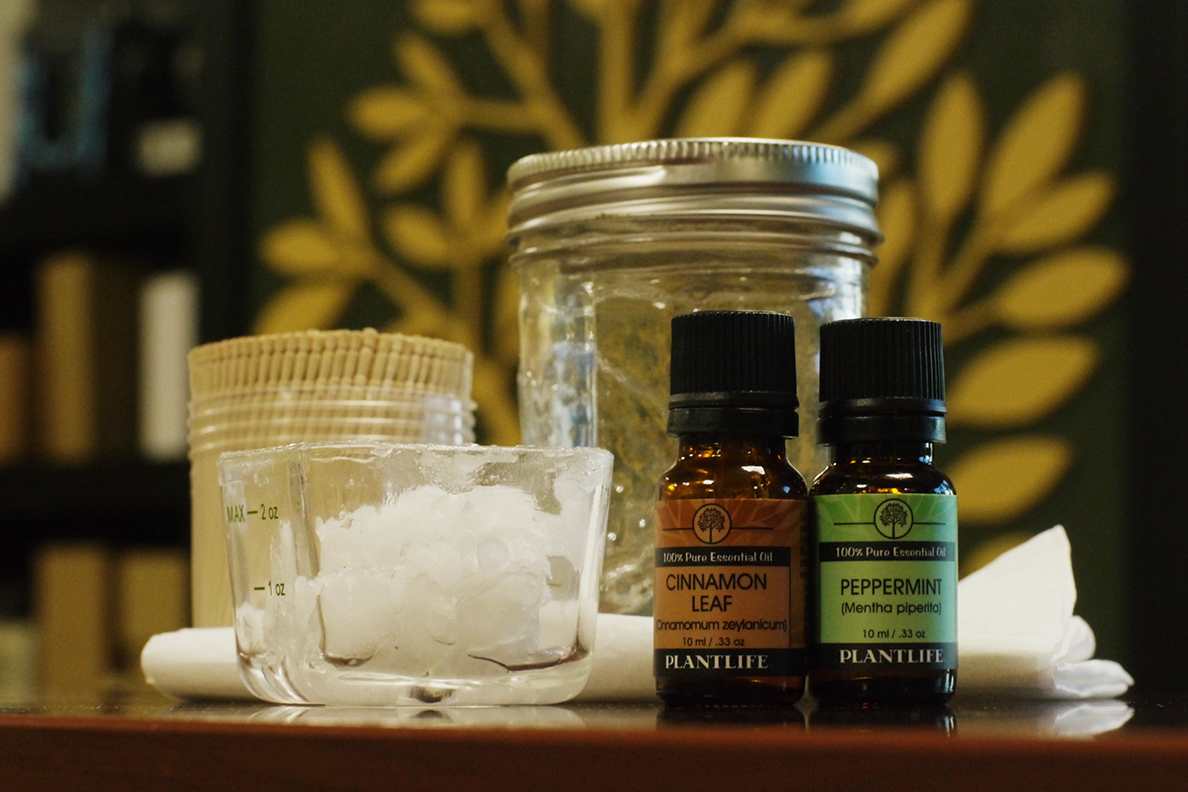
- A Clean Glass Jar with tight fitting lid.
- 100% Pure Essential Oils (We used Cinnamon Leaf and Peppermint)
- Fractionated Coconut Oil (If you use another kind, make sure to mix it up!)
- Paper Towels for drying
- Metal Tin or Glass Container with Lid for storage.
- Tweezers or Tongs (Optional)
Step One: Getting Started

Pour a small amount of your essential oil or blend into the glass container, then stand the toothpicks so one end is immersed. While you can cover the entire toothpick, it is not necessary as they act almost like a straw. The oils will slowly soak in from one end to the other in time (between 24-48 hours).

If you are going to use an essential oil that may burn the lips (like Cinnamon Leaf), feel free to dilute it with ½-2 teaspoons of fractionated coconut oil. To make it sweeter, try adding 1-2 drops of Liquid Stevia.
Step Two: Wait.

This is the easy part. Just close the lid on your glass container and let it sit in a cool dark place for 24-48 hours. This will lock in and concentrate the essential oil aroma. The lid will also help keep the oil’s aroma from slowly filling the room. Take care not to shake or jostle the jar, in case your lid does not seal 100%.
Step Three: Drying

Once your chosen amount of time has elapsed, it’s time to lay down some paper towels because things might get a little messy. It helps to double or triple layer the towels, just in case. Once you have your drying station set up, go ahead and open up the container(s). If you opted to use tongs or tweezers, now would be the time to grab them. Carefully remove the toothpicks from the jar and place them on the paper towels. Leave enough space between the toothpicks so they can get the proper amount of air, as this will help them dry more quickly.
What about the remaining oil?
Save it to make more toothpicks, or use it for other projects!
Step 4: Storage


You can store these puppies any way you desire. Whether it’s a nice glass jar, like the ones you might have made them in, or a repurposed mint case for using them on the go, the possibilities are (mostly) endless.
Step 5: Enjoy.
They don’t just have to be for cleaning teeth or chewing on. Try them as a dessert delivery system: peppermint toothpicks could be the perfect pairing to serve your favorite chocolate cake balls.
Get creative.
If you have any interesting ideas, let us know in the comments!
Additional Notes:
Make sure whatever Essential Oils you choose to use are on the FDA “Generally Recognized As Safe” (or GRAS) list.
Other great Essential Oils to try: